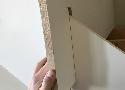
How to Fine-Tune Door Hinges - Fine Homebuilding


Whether the door is new or old, Tucker Windover's technique produces a perfectly aligned door that closes properly and stays shut.
To learn more about Windover’s technique, read Hinge Adjustment for a Door’s Final Fit from Fine Homebuilding Issue #192 (Dec 2007/Jan 2008), pp.110-117.
https://www.finehomebuilding.com/2007/11/06/hinge-adjustment-for-a-doors-final-fit
2 Rules for Building Comfortable Stairs - Fine Homebuilding
As the rise goes down, the run needs to go up correspondingly, or vice versa.
To summarize:
The rise plus the run (r+R) should be within an inch of 18”.
Twice the rise plus the run (2r+R) should be within an inch of 25”.
IRC code limit stair:
rise r ≤ 7 3/4″
run R ≥ 10″
r+R = 17 3/4″ (good)
2r+R = 25 1/2″ (within range)
→ stair will be comfortable
Frame a Door Rough Opening - Fine Homebuilding
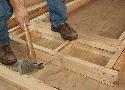
Oregon builder, Scott Grice, teaches you his 3 simple rules for framing door rough openings efficiently. Grice begins the process by marking all the plates at the same time; the plates are marked with the trimmer, stud, header, and cripple locations.
By Scott Grice Issue 201
Video Series: How to Install Interior Extension Jambs and Window Trim - Fine Homebuilding

Remodeler Mike Sloggatt finishes off this replacement-window project and teaches you how to install interior extension jambs.
I Bet You Don't Know At Least ONE Of These Blue Tape Tricks

- Add a flag when wrapping around a drill bit - stop when flag blows away sawdust
- Put on wood before drilling holes - Mark on tape, not on wood!
- Wrap around piece before sawing on miter saw to avoid tear-out
- Tape piece to bench for extra hand / clamp
- Use tape as epoxy dispenser
- Mark start and stop on router table (and miter saw??)
- Mask off work before gluing to avoid drips
Family Handyman DIY University: home repair online classes
Sharpen your home repair DIY skills with online home improvement classes from the experts. Learn more today and start building more tomorrow at DIY University!
What You Need to Know About a Home’s Crawlspace

The crawlspace is often an out-of-sight, out-of-mind part of a home. But there are things to know, including how to utilize that space.
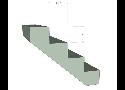
Laying Out Basic Stair Stringers - Fine Homebuilding
1. Clamp a guide to the square.
To make it easy to align the framing square on the stringer consistently, clamp a straight wood strip to the square. On the outer edges of the square, align the strip with the run dimension on one leg and the rise dimension on the other.
2. Find the crown.
Sight down the edge of the stringer stock to determine if it crowns. If it does, lay out the stringer so that the crown on the completed stair will face upward.
3. Lay out the first tread and the second riser.
Hold the square so that the leg with the tread dimension is closest to the end of the stringer stock but far enough from the end to allow for a riser below. Try to lay out the notches so that cutting them gets rid of knots and defects.
https://www.finehomebuilding.com/2013/10/15/lay-out-accurate-stair-stringers-with-this-custom-tool
By Andy Engel Issue 248 - Dec/Jan 2015
Making Sense of Minisplits - Fine Homebuilding

For well-insulated houses, minisplits are beginning to dominate the market. They are especially suited for lower heating and cooling loads and providing quiet comfort with surprisingly low amounts of energy—energy that can be produced on-site or pulled from renewable sources on the grid.
Minisplits have a few disadvantages and downsides, and they are interrelated, combining to make or break the minisplit decision. The big three are the price of electricity, the severity of the winter, and the quality of the building envelope.
From Fine Homebuilding #296
How to Build an Under-the-Stairs Storage Unit | Family Handyman

Need extra storage space? You might already have it right under your feet! Builders rarely utilize the space under a staircase; it’s much easier to just wall it in than to make custom pullouts. But you can reclaim that wasted space in a couple of weekends. I built three pullouts to store everything from shoes to coats and backpacks. You can customize this design to get just the type of storage space you need.
Bolt Depot - Pilot Hole Sizes for Wood Screws
Lots of other useful information for finding sizes of screws and washers
Repointing a Brick Chimney - Fine Homebuilding

By Matthew Millham Issue 293 - August/September
How to Install a Durable Asphalt Driveway | Family Handyman
Learn how the pros make asphalt driveways that last
How To Install Recessed Lights in Kitchen

- electrical box clamps
- plug in connections
Our Semihandmade doors on IKEA cabinets- ALL the details! - Nesting With Grace

Putting in a brand new kitchen is always a big deal!!! If you have or are planning to take on a kitchen remodel in your home, you know the pressure! Don’t get me wrong, it’s fun and exciting and makes such a huge impact on your home and your home’s value, but everyone wants to get it “right”— and that can feel overwhelming! The fun of a new kitchen space can quickly be sucked up by the fear of doing it wrong or regretting your choices. Long before we were done installing, I had so many requests for details on our Semihandmade with IKEA Cabinets. I thought I would share our entire process from beginning to end and hopefully help you feel confident moving forward with your own project!
The Britches Method: A Simple Template for Outside Skirt Returns - Fine Homebuilding
Ever wondered how to lay out an outside skirt board when building stairs? This was one of those processes that was a trade secret when I started. I’ve had a few variations on this over the years, but this is my favorite way to go! This method is the Britches Method.
The Secret to Coping Crown Molding - Fine Homebuilding

My favorite way to establish a guideline is to use a 2-ft.-long piece that’s coped accurately and a 2-ft.-long square-cut piece. Fitted in the corner, the coped piece locates the square piece at the correct projections, and you can mark the top and/or bottom. The longer pieces take into account more of the wall and ceiling conditions than small gauge blocks.
How to Make a Crosscut Sled for Your Tablesaw - Fine Homebuilding
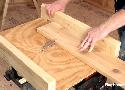
Note: the project in this video is a down-and-dirty job-site project for when you need a crosscut sled in a pinch; if you have the time, tools, and materials to build something more refined, read the article “Build a Tablesaw Crosscut Sled” from Fine Homebuilding issue #180.
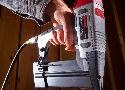
Finish Nailer Tips | Family Handyman
18-gauge brad nailer
If you plan to buy only one trim nailer, this is the size to get. I use mine more than all my others combined. It’s perfect for standard trim, furniture making and odd jobs around the shop. Models that shoot brads up to 1-1/4- in. are common, but I strongly recommend spending a few bucks more for a gun that can handle brads up to 2 in. long. Name-brand 2-in. guns start under $100.
Use nails before screws
I always found it difficult to keep parts aligned when screwing cabinets together. Then I discovered that a couple of shots with my finish nailer or brad nailer will keep the parts aligned while I drill pilot holes and drive screws for strong joints.
Invisible nail holes with a pinner
Pins are tiny and headless, so they’re hard to see even before you fill them. Afterward, nobody but you will know they’re there.
Nail before you clamp
With a coat of slippery glue, parts will slide out of alignment while you’re desperately trying to clamp them. My solution is to tack the parts together with a couple of nails. That keeps the parts aligned while I apply serious pressure with clamps.
No stud? No problem
Studs aren’t always located where we need them. When I need to nail trim where there’s no stud, I dab some construction adhesive on the back of the trim and then drive nails into the drywall at 45-degree angles. That holds the trim tight against the wall while the adhesive cures. This “trap nailing” technique works fine with brad nailers and even better with finish nailers.