Daily Shaarli
All links of one day in a single page.
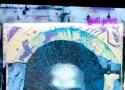
Welcome to my latest Gelli Plate Printmaking tutorial or rather where I stumble through lots of problems and figure out ways to fix them 🖌️ Wonderful comments from very skilled printmakers told me this tip to help with my laser print image transfers with my Gelli plate. It made a world of difference.
🎨 Learn More About Gel Plate Monotypes!
-
Join the Waitlist for my Gel Plate Monotype Course: https://www.bluelavaartacademy.com/wait-list
-
My Supplies: Check out the tools I use in my Amazon Storefront: https://shorturl.at/bqDNV
❤ Subscribe and Stay Connected!
- Never miss a video! Subscribe to my channel: https://www.youtube.com/bluelavaart?sub_confirmation=1
- Get exclusive content and my Gel Plate Handbook with tips and tricks by joining my YouTube Membership: https://www.youtube.com/channel/UCXOX7zQaTwdTj860t1GSCtQ/join
🖌 How to Create a Gelli Plate Monotype with Your Own Photo:
- Apply Acrylic Paint: Spread a smooth, thin layer on the Gelli plate using a brayer.
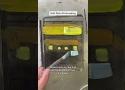
- Place Your Image: Lay your laser-printed photo face-down on the plate and press gently for solid contact.
- Transfer the Image: Use a brayer or your fingertips to apply even pressure for a flawless transfer.
- Peel and Reveal: Carefully lift the photo to reveal your image on the plate.
- Reverse Painting: Add one or more layers of acrylic paint, letting each layer dry completely.
- Pick-Up Layer: Apply paint or gel medium evenly, press Bristol board onto the plate, weigh it down with books, and let it dry for 20–30 minutes (or overnight).