Daily Shaarli
Box joints are an easy yet effective joinery method! Box joints, or sometimes referred to as finger joints, can be cut with a regular table saw blade or with a dado stack of your preferred width. The ones featured in the video are cut at 1/4" wide and were perfect for my current shop project, which will be a wall hanging router bit storage cabinet.
** Other videos on youtube

Make your own DIY leather desk pad with this quick and easy beginner leather project; leatherworking tools are optional!
Where I get my leather (UK): https://majestichides.co.uk/3sqft-21x21--pit-veg-tanned-brown-crazy-horse-leather-hides-1748-p.asp
4mm full-grain veg-tanning (stiffer)
Tools I use in my leather projects (updated to what I use NOW):
L'indispensable knife: https://amzn.to/3ca7Umw
Edge beveller 0.6mm: https://amzn.to/3iim4G5
Tokenole edge burnisher: https://amzn.to/3ixY0yS
Low cost Japanese skiving knife: https://amzn.to/3fG8hHw
Awesome rotary cutter: https://amzn.to/3uLcQEw
Cutting mat: https://amzn.to/34HhoBu
Edge paint marker: https://amzn.to/2S8uNj8
Hole punch set: https://amzn.to/3yZjHhh
Stitching punches: https://amzn.to/3iimOel
Steel ruler: https://amzn.to/3icJcph
Wing Dividers: https://amzn.to/3w4XgVU
This beginner leather tutorial goes through the process of making your own DIY leather desk mat, from materials, to tooling, to the making process. This project can be completed with tools you will already have around the house, but I also show how some beginner leather tooling can be used to improve the overall quality of your leather desk pad.
If you are new to leather craft, this video is the latest in a short series of tutorials on leather crafting for beginners. While I usually include free leather patterns for you to download, there is no specific leather desk pad pattern so that you can design this to suit your specific needs! The desk pad made in this video is 23x12": a pretty standard small sized desk pad which works perfectly as a keyboard mat and an easy DIY mouse pad, or as a place to work on your laptop!
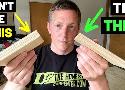
DON'T USE 3/4" PLYWOOD If You Don't Need It...TRY THIS! (1/2" Plywood Vs. 3/4" Plywood--When to Use)
Many new woodworkers and DIYers rush to use 3/4" plywood for any small project. But, in many cases, 3/4" plywood is overkill! This short video from The Honest Carpenter will show you a better alternative for many DIY projects--1/2" plywood!
1/2" plywood comes in nearly every variety that 3/4" plywood does. It's extremely strong and stable.
Many people seem to avoid 1/2" plywood on the assumption that it's weak. But, it has many of the same properties as 3/4" plywood.
(3/4" is a much more common measurement for wood in general--this may be one of the reasons that people assume that they need to purchase 3/4" plywood.)
BENEFITS OF 1/2" PLYWOOD:
--It's lighter (by almost 20 lbs. per sheet)
--It's cheaper (by $10-12 on overage per sheet)
--It's easier on tools
--It produces less sawdust
--It is easier to handle and manipulate
--It has an edge just wide enough to be hit with brads and trim nails
SITUATIONS WHERE 3/4" PLYWOOD IS PREFERRED:
--Anything that will be walked on
--Anything that will be hit hard with tools
--Anything that will be roughly handled.
TIPS FOR WORKING WITH 1/2" PLYWOOD:
--Try not to span it more than 24" unsupported in any direction
--Get support directly beneath the edges
--Use glue when bonding pieces
--Use face frames for additional support on trim projects
Thanks for watching! Be sure to check us out at The Honest Carpenter Website:
www.thehonestcarpenter.com