
99% of Beginners Don't Know the Basics of Router Bits

-
He likes whiteside router bits better than bosch
-
1/8" and 3/8" roundover bits - If roundover is deep, you put a profile on the edge
-
The bigger the bit, the slower the speed of the router
-
Make a L with your right hand palm down and thumb down. The pointer finger points in the direction to move the router -> clockwise inside, counterclockwise outer.
-
Depth of cut should be no deeper than width of bit (1/4" straight bits)
-
Dovetail tracks on the workbench??
-
Flat side of base against fence
-
Tiny router table
Router Edge Guide: 6 Tips for Perfect Edges| Family Handyman
Modern router bits with carbide cutters and guide bearings make forming wood edges almost foolproof. Try this router edge guide for tips.
-
Router bits spin clockwise as you look down on the router, so moving the router counterclockwise tends to pull the pilot bearing tight against the wood and allows easy control of the router. When you’re routing the outside perimeter of a board, move the router counterclockwise. However, when you’re routing the inside of something like a picture frame, move the router in a clockwise direction.
-
Secure Small Work With Hot-Melt Glue
-
Make Moldings With Your Edge Router
Installing Window Trim the Easy Way: MDF Trim Molding (DIY)

Don't let the elegant look fool you. This trim is actually easier than the standard 'picture frame' trim used in most homes since the 1950s.
For this project, you'll need 1/2-in.- and 3/4-in.-thick MDF, and some paintable 1x3 lumber for the stools. We recommend wood for the stool because unlike MDF, it'll withstand a little moisture from window condensation. We used pine, but poplar, maple and birch would also work well.
You can figure out how much material you need using your cutting list, but as a rough estimate you can cut parts for about four or five windows from one 4 x 8-ft. sheet of MDF. MDF is heavy, and full sheets are hard to handle. Ask to have the sheets cut in half lengthwise at the home center.
Basic router bits: roundover, ogee, cove
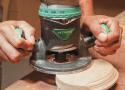
How to Make Box Joints with Only a Router | Woodworking Jig

How to make finger and box joints with only a router. No table saw necessary! Brought to you by Squarespace. For 10% off your first purchase, go to: http://squarespace.com/makesomething
Hardwood from Kencraft:
https://goo.gl/pCyB95
How to make box joints (sometimes called finger joints) using only a router. Making box joints on the table saw requires a dado stack which isn’t available in all areas. The next best method is at the router table but not everyone has the space for a dedicated router table. This tutorial video shows a simple method on making a jig out of plywood for a hand held router that attaches to the base. Once you make this woodworking jig you’ll always be set up for box joints and finger joints. If you choose to change up your box joint finger width you’ll need to swap out the bit and make a dedicated fence for that bit.
How to Make and Use Router Templates
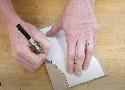
Learn how to make and use router templates when you are building your woodworking projects. Router templates can help you do three main things: First, they can help you trace complex shapes onto your project parts quickly and easily. Once you’ve got the template, you don’t have to lay all of this out again manually. Second, you can use your templates to actually make your project parts with a router and the right bits. And finally, you can keep your templates for possible re-use. That can save a lot of layout time down the road, if should you decide to make the project again.